Looking to refresh your living space without spending a fortune? DIY home décor projects offer the perfect solution for creating a personalized, beautiful home on a budget. Whether you’re a complete beginner or just starting to explore your creative side, these ten easy-to-follow projects will help you transform your space while building your crafting confidence.
Easy DIY Home Décor Projects for Beginners
From elegant mason jar luminaries to stunning wall art, each project is designed to be achievable, affordable, and absolutely gorgeous. Let’s dive into these creative DIY home décor ideas that will have your friends asking, “Where did you buy that?”
Table of Contents
1. Mason Jar Luminaries
Difficulty: Easy | Time: 30 minutes | Cost: $10-15
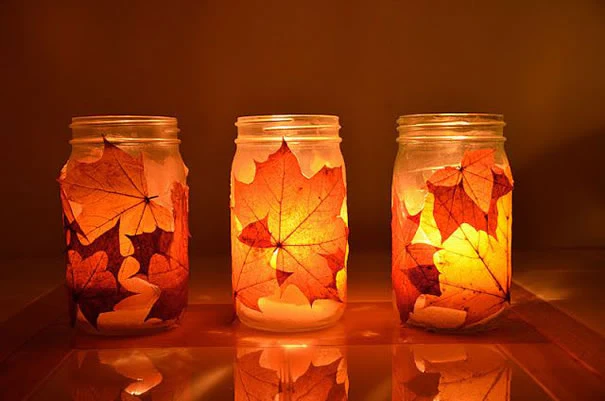
Transform ordinary mason jars into enchanting light fixtures that add warmth and ambiance to any room. This beginner-friendly DIY project creates beautiful luminaries perfect for mantels, dining tables, or outdoor entertaining spaces.
Materials Needed:
- 3-4 mason jars (varying sizes)
- Battery-operated fairy lights (warm white)
- Frosted glass spray paint
- Twine or decorative ribbon
- Painter’s tape
- Clean cloth
- Rubbing alcohol
Step-by-Step Instructions:
- Clean jars thoroughly with rubbing alcohol and dry completely
- Tape off any areas you don’t want painted (optional design element)
- In a well-ventilated area, apply first coat of frosted spray paint
- Allow to dry for 10 minutes
- Apply second coat for even coverage
- Let dry completely (20-30 minutes)
- Remove tape if used
- Insert fairy lights
- Wrap twine or ribbon around the jar’s neck
- Arrange in groups of three for maximum impact
Pro Tip: Create depth by using jars of different heights and varying the length of twine wrapping.
2. Textured Canvas Wall Art
Difficulty: Beginner | Time: 1-2 hours | Cost: $20-30
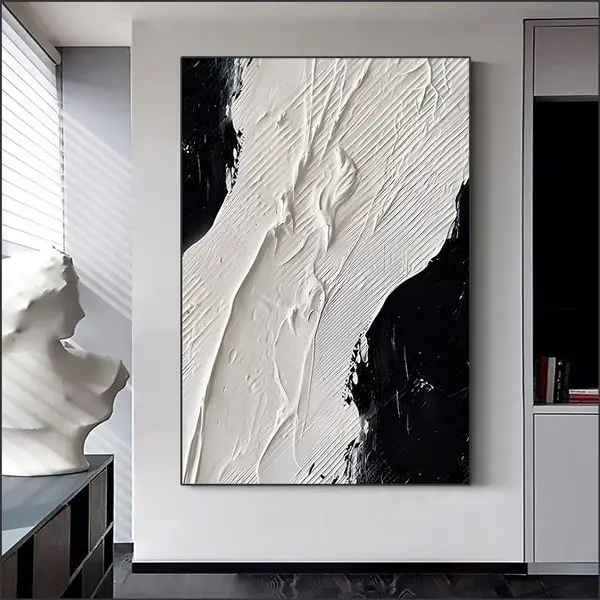
Create stunning abstract art pieces that perfectly match your color scheme while expressing your creativity. This DIY project teaches basic texture techniques that look professional but require no artistic experience.
Materials Needed:
- 16×20 inch blank canvas
- Acrylic paint (2-3 complementary colors)
- Texture medium or modeling paste
- Palette knife
- Wide paint brush
- Small detail brush
- Paint palette or paper plate
- Water cup
- Paper towels
Step-by-Step Instructions:
- Prepare your workspace with a protective cover
- Mix your base color with texture medium (1:1 ratio)
- Apply base color to entire canvas using broad strokes
- While wet, create texture patterns using the palette knife
- Try sweeping curves
- Create cross-hatching patterns
- Build up layers in corners
- Let base layer dry completely (30-45 minutes)
- Add second color in strategic areas
- Create highlights with your lightest color
- Allow to dry overnight before hanging
Pro Tip: Take a photo of your room and use a color picker tool to select complementary paint colors that match your décor.
3. Macramé Plant Hanger
Difficulty: Beginner-Intermediate | Time: 2 hours | Cost: $15-25
Bring natural elements into your space with this trendy plant display solution. Macramé adds texture and bohemian charm while keeping your plants safely suspended.
Materials Needed:
- 50 feet of 4mm macramé cord
- Measuring tape
- Sharp scissors
- Metal ring (2-3 inch diameter)
- Plant pot (6-8 inch diameter)
- Optional: wooden beads
Step-by-Step Instructions:
- Cut four 8-foot lengths of cord
- Fold each cord in half and attach to ring using larks head knots
- Separate cords into four groups of four strands
- Create square knots in each group:
- Left over middle, right under middle
- Right over middle, left under middle
- Continue pattern for 12 inches
- Combine groups in alternating square knots
- Create basket by cross-knotting all cords
- Add gathering knot at bottom
- Trim and style ends
Pro Tip: Practice basic knots on a small sample piece before starting your main project.
4. Floating Picture Ledges
Difficulty: Intermediate | Time: 2-3 hours | Cost: $30-40
Create sleek, modern display shelves perfect for artwork, photos, or small décor items. These versatile ledges offer easy changeability for your displayed items.
Materials Needed:
- 1×4 pine board (length as desired)
- 1×2 pine board (same length)
- Wood glue
- Finish nails
- Sandpaper (medium and fine grit)
- Paint or stain
- Level
- Drill and screws
- Wall anchors
- Measuring tape
- Pencil
Step-by-Step Instructions:
- Cut boards to desired length
- Sand all pieces smooth
- Create lip by attaching 1×2 to front edge of 1×4
- Add support pieces every 16 inches
- Fill nail holes with wood filler
- Sand again lightly
- Paint or stain as desired
- Mark wall for mounting
- Install using anchors and screws
- Check level and adjust as needed
5. Woven Wall Basket
Difficulty: Easy | Time: 1 hour | Cost: $15-20
Transform a basic basket into eye-catching wall art that adds texture and storage to any room.
Materials Needed:
- Flat-backed woven basket
- Paint or spray paint
- Artificial or dried flowers
- Strong mounting hardware
- Level
- Pencil
- Hammer
- Command strips (optional)
Step-by-Step Instructions:
- Clean basket thoroughly
- Paint if desired (optional)
- Allow paint to dry completely
- Arrange flowers or greenery
- Secure arrangements with hot glue
- Mark mounting points on wall
- Install appropriate hardware
- Hang basket
- Adjust arrangement as needed
6. Custom Photo Canvas Prints
Difficulty: Easy | Time: 1-2 hours | Cost: $25-35
Create professional-looking canvas prints using your favorite photos and basic crafting materials.
Materials Needed:
- Blank canvas
- Printed photos (sized to canvas)
- Mod Podge
- Foam brush
- Scissors
- Ruler
- Pencil
- Clear acrylic sealer
Step-by-Step Instructions:
- Print photos to size
- Trim photos precisely
- Apply Mod Podge to canvas
- Carefully position photo
- Smooth out air bubbles
- Apply top coat of Mod Podge
- Let dry completely
- Spray with acrylic sealer
- Add hanging hardware
7. Geometric Wall Design
Difficulty: Intermediate | Time: 3-4 hours | Cost: $40-50
Create a stunning accent wall using paint and painter’s tape to form geometric patterns.
Materials Needed:
- Paint (2-3 colors)
- Painter’s tape
- Level
- Measuring tape
- Pencil
- Paint rollers
- Paint brushes
- Drop cloth
Step-by-Step Instructions:
- Clean and prep wall
- Paint base color
- Let dry completely (24 hours)
- Measure and mark design points
- Apply tape in pattern
- Press tape edges firmly
- Paint geometric shapes
- Remove tape while paint is slightly wet
- Touch up as needed
8. Rope Basket Storage
Difficulty: Easy | Time: 1-2 hours | Cost: $20-25
Create stylish storage solutions using rope and basic sewing skills.
Materials Needed:
- Cotton rope (1/4 inch thick)
- Thread matching rope color
- Sewing machine
- Scissors
- Pins
- Measuring tape
Step-by-Step Instructions:
- Coil rope into base spiral
- Pin first few coils
- Begin sewing spiral
- Continue adding rope
- Build up sides gradually
- Shape as desired
- Secure final row
- Trim excess rope
- Add handles if desired
9. Pressed Flower Art
Difficulty: Easy | Time: Several days | Cost: $25-30
Create delicate, natural wall art using pressed flowers and simple framing techniques.
Materials Needed:
- Fresh flowers
- Heavy books
- Parchment paper
- Frame
- Acid-free paper
- Clear mounting corners
- Ruler
- Pencil
Step-by-Step Instructions:
- Select and clean flowers
- Arrange between parchment
- Press in books (1-2 weeks)
- Design arrangement
- Mount flowers
- Frame carefully
- Seal back of frame
10. Concrete Planters
Difficulty: Intermediate | Time: 2-3 hours plus drying | Cost: $30-40
Create modern, minimalist planters perfect for succulents or small plants.
Materials Needed:
- Quick-setting concrete
- Mixing bucket
- Plastic containers (for molds)
- Cooking spray
- Sandpaper
- Paint (optional)
- Drainage materials
Step-by-Step Instructions:
- Prepare molds with spray
- Mix concrete according to instructions
- Pour into molds
- Create drainage holes
- Let cure completely
- Remove from molds
- Sand rough edges
- Paint if desired
- Add drainage materials
- Plant as desired
Expert Tips for Success
- Always read through all instructions before starting any project
- Gather all materials before beginning
- Work in a well-ventilated area when using paints or adhesives
- Create a dedicated crafting space with good lighting
- Keep basic tools organized and accessible
- Take progress photos to track your journey
- Don’t be afraid to customize projects to your style
- Start with simpler projects to build confidence
- Join online DIY communities for support and inspiration
FAQ Section
Q: Do I need special tools for these DIY projects?
A: Most projects require basic household tools like scissors, measuring tape, and screwdrivers. Specific requirements are listed with each project.
Q: How can I avoid common DIY mistakes?
A: Read instructions completely before starting, prepare all materials in advance, and don’t rush the process. Start with simpler projects to build confidence.
Q: Where can I source affordable materials?
A: Check craft stores during sales, dollar stores, thrift shops, and online marketplaces. Sign up for craft store newsletters to receive coupons.
Q: How do I choose which project to start with?
A: Consider your skill level, available time, and needed materials. Mason jar luminaries and pressed flower art are perfect first projects.
Q: What if I make a mistake?
A: Mistakes are part of the learning process! Most projects can be fixed or modified, and each attempt builds your skills.
Conclusion
Creating beautiful DIY home décor doesn’t require professional expertise or expensive materials. These ten projects offer a perfect starting point for beginners while providing enough creative flexibility for more experienced crafters. Remember, the joy of DIY comes not just from the finished product, but from the creative journey and the satisfaction of making something with your own hands.
Start with one project that speaks to you, gather your materials, and enjoy the process of transforming your space. Soon you’ll have a collection of handmade décor pieces that reflect your personal style and creativity.